Articles by "surveying and leveling"


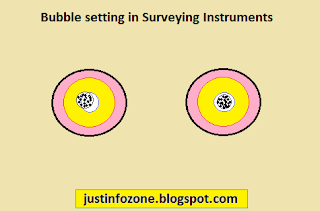
  • Bubble should be centered carefully and it should be re-checked continuously during survey.
  • Tripod should be fixed at suitable height so that field officer can easily take the readings.
  • Foot screws of the level should be fastened or tightened properly.
  • Tripod legs should be properly adjusted in the ground soul. 
  • Pass on necessary instructions to the rod man before starting the survey.
  • Rod man should be directed before start of survey that rod should always be kept in state.
  • Staff rod should be checked before conducting the survey,so that it may not cause error.
  • Survey should be preferably conducted in the morning or in the evening.
  • Bench Mark should be established at proper and permanent places and their elevation should be marked, if possible.
  • Ground should be leveled before taking the readings at turning point/change point and reading should be taken very carefully.
  • Level should be handled and shifted carefully.
  • Data like acre number,square meter and station distance should be carefully written on the field book.
  • Level set should be handled and shifted very carefully.
  • Survey must be closed.
  • Level set equipment should be carefully packed after completing survey.


surveying and leveling teqniques

Leveling Procedure

After the instrument has been leveled, a staff rod reading i.e back sight reading is taken on Bench mark and height of instrument is computed from this reading.
Take as you want the intermediate sight (I.S.) readings and note it to the field book.A Turning point is necessary when, it is difficult to sight the reading with the same 
set of instrument. Before the Turning point (T.P.) the Take the Foresight (F.S.) reading. Foresight reading is very important in the surveying and leveling.The instrument
is carried to a new position along the line,re leveled, and Take your first Back sight reading after setting the dumpy level.It will provide you new H.I. Additional I.S. can be taken 
along the line and process is continued until the survey is closed.

Determination of Elevation:

The elevation of point is determined by subtracting its rod reading from height of instrument. Suppose your elevation of the Bench mark is 12. Meter. The Staff reading at this point is 1.68 m.
The relative rod reading of other place is 1.85. So determine the elevation of this place is 
                        B.M. = 12 M
                        B.S. = 1.68 m
                        F.S. = 1.88 m
                        H.I. = B.M. + B.S.
                        H.I. = 12 + 1.68 = 13.68 m
            So 
                        Elevation = H.I. - F.S
                                  = 13.68 - 1.85 
                                  = 11.83 m
When the point will be higher, elevation will be higher but rod reading at this point will be lower and vice versa.

Determination of horizontal Distance by stadia Method.

When it is need to measure distance with quick time with accuracy, the stadia method is used. Surveying instrument equipped for stadia measurement have two additional horizontal cross hairs called stadia hairs shown in figure.
They are placed in a position with one below the horizontal leveling cross hair,so that when a leveling rod is held 100 units away from the level, there will be 1.00 unit of staff visible between the top and bottom stadia hairs.
Thus if a metric staff is held 100 meters from the instrument, a difference in vertical interval between the top and bottom stadia hairs will be 1 m. The difference between the rod reading of the top stadia hair and the rod reading of the 
bottom stadia hair is called stadia interval. The distance in meters from the instrument to the rod is equal to the stadia interval multiplied by 100.
For Example (Shown in the figure) The top stadia hair reading is 1.46 and the bottom stadia hair reading is .87. Thus the stadia interval is equal to .59 meter. The distance from the instrument to the rod is equal to .59 multiplied by 100 which gives a distance of 59 meter.
Determination of horizontal distance by stadia method


Basics of Surveying and leveling

Datum Surface

A datum surface or line is any arbitrarily assumed level surface or line from which vertical distance are measured. Mean see level is usually used as standard datum, however assumed datum may be used for minor surveys.

Bench Mark

It is permanent established mark, the elevation of which is known to use as reference point in obtaining the elevations of subsequent stations. The elevation may be assumed in case it is not known.

Back Sight (B.S.)

A back sight also termed as a back sight reading, is a staff (or rod) reading taken on a point of known elevation as on a bench mark or a change point. It is also called a plus sight. It is the first reading taken after the level is set up and leveled.

Foresight (F.S.)

A foresight also called foresight reading, is a staff (or rod) reading on a point whose elevation is to be determine as on a change point. It is also termed as a minus sight. It is the last staff reading with the same setup of instrument denoting the shifting of the instrument. It must be remembered here that the foresight does not imply any direction , but it denotes the reading.

Intermediate Sight (I.S.)

An intermediate sight is any other staff reading taken on a point of unknown elevation from the same set-up of the level. All sights taken between the back sight and foresight are intermediate sights.

Elevation

The vertical distance of point from the datum is called elevation. It is also known as the reduced level (R.L.) The elevation of a point is plus or minus accordingly as the point is above or below the datum.
Elevation = H.I. – I.S. or F.S.

Line of Collimation

The  line of collimation is the line joining the intersection of the cross-hairs to the optical center of the object glass and its continuation. It is also called the line of sight.

Axis of the telescope

An axis of the telescope is a line joining the optical center of the object glass to the center of the eyepiece.

Change point or Turning point (T.P.)

A change point is a point denoting the shifting of the level. It is a point on which the fore and back sights are taken. Any stable and well defined object such as boundary wall , rock, etc is used as a change point. A bench mark may also be taken as change point. 

Station

A station is a point whose elevation is to be determined or a point which is to be established at a given elevation. It may be noted that it is point where the staff is held and not the point where the level is set up.

Height of Instrument. (H.I.)

The height of horizontal line (line of sight) from the datum is called height of instrument.
H.I. = B.S. + Elevation  

Hand signal used in surveying images

Hand Counting signals used in surveying

A good system of hand signals between members of a surveying party make a more efficient means of communication than is possible by word of mouth. Any code of signals mutually understood by the instrument-man and Rodman is good if it work. The instrument –man should be prompt in signaling the Rodman when he is finished with “Shot” so that the Rodman can move off promptly to the next point. It is also desirable to have a system of signals so that numbers can be transmitted from Rodman to instrument-man or vice versa.
The code of signals illustrated in Fig.

1: Setting up the instrument.


tripod setting in surveying
  • Unbuckle the band around the tripod legs and loosen the extension clamp screws.
  • With the tripod closed, extend the tripod legs until the tripod head is roughly at eye level, then re-tighten the clamp screws.
  • Spread the tripod legs so that the leg tips from a regular triangle on the ground.

  • Make sure that the tripod head is approximately level. Fix the tripod shoes firmly into the ground.
  • Hold the instrument on the tripod head and tighten the centering screw.
  • When using the spherical head tripod, slightly loosen the centering screw, hold the base plate in both hands, and slide it across the tripod head until the bubble is approximately centered in the circular level.
  • Tighten the centering screw.
  • Adjust the leveling foot screws until the bubble is exactly centered in the center circle.


1: Setting up the instrument.

2: Focusing and Sighting.

  • Sight  a bright, featureless background.
  • Turn the eyepiece fully clockwise and focus the reticle by gradually turning the eyepiece anticlockwise while looking through the telescope. Stop turning just before the reticle image becomes blurred. In this way, frequent reticle focusing can be displaced with since your eye is focused at infinity.
  • Align the instrument on the staff using the peep sight and turn the horizontal fine motion screw to center the staff in the filed of view. Turn the speed focusing knob to eliminate parallax (between the staff and the reticle.). The reverse rotation will give a fine focusing motion.
Preliminaries of Surveying and leveling.

 Surveying
Surveying is the art of making such measurements which will determine the relative positions of natural and man-made features on the surface
of the earth and plotting these measurements to some suitable scale to form a map,plan or section. In practice , however, surveying is often used
for determining positions of different features of earth in horizontal plane.
Leveling
Leveling is the art of determining and representing the relative heights or elevations of different points on the surface of the earth. Leveling is usually
used for determining positions of points in vertical plane.Surveying and leveling are frequently considered as distinct operations, however, the term surveying
includes leveling.
Differential leveling
This method is used in order to find the difference in elevation between two points i) if they are too far apart  ii) if the difference in elevation between them is too great
iii) if there are obstacles intervening. This process is also known as compound or continuous leveling.
Equipment used in surveying and leveling.
Measuring Tapes
Plastic tapes are now the most common type available for surveying and leveling. They usually come in lengths of 30 meters. Measurements not requiring a high degree of accuracy,such as dimensions
of existing bridge opening,short distance in cross sections and distances for strip cropping and orchard layouts are usually made with a tape.
meausring tape used in survey

Measuring Wheels
These are wheels of a known circumference mounted in a frame with a handle so that the wheel may be easily pushed along a line. The wheel is fitted with a trip meter which records the turns of the wheel over
a distance between two points. The trip meter usually measures to a tenth of a meter. The measuring wheel is useful method of obtaining the approximate 
length of a line.However, where the ground surface is rough, the accuracy of this method is significantly reduced.

Staff Rod
The staff rod is used for the purpose of measuring vertical distance.The width of black line is 0.01 meter (1 centimeter) and the width of the white space between black line is 0.01 meter.
The numbers on the face of the staff give the distance in meters from the bottom of the rod.
staff rod enlarge view to read


Ranging Rods
The ranging rod is a one or two piece pole usually 2 meter in length, painted red and white. It is generally used to establish a "line of sight"
ranging rod in surveying

Field book

 Engineering field books are used for the recording of survey notes and layouts. They are valuable documents because of the time and expense involved in obtaining such data.
Self Leveling Level-Dumpy Level
The self leveling level or dumpy level automatically levels its line of sight with great accuracy. It levels itself by means of a compensator after the circular spirit level is centered approximately. It is 
precise as well as simple and quick to operate. This instrument is used primarily for measuring vertical heights (elevations) of the points. However, horizontal distances and angles can also be measured by using this instrument.The parts of dumpy level are shown in figure.


MKRdezign

Contact Form

Name

Email *

Message *

Powered by Blogger.
Javascript DisablePlease Enable Javascript To See All Widget